- Why we need JDK and Maven?
- Mulesoft is build on top of Spring framework and Spring made on top of Java. So, to work to Mulesoft we must have JDK to install.
- As Anypoint Studio is build with Eclipse and it uses maven to use the Mule project dependencies. So, we must need maven to be installed.
- Open Anypoint Studio.
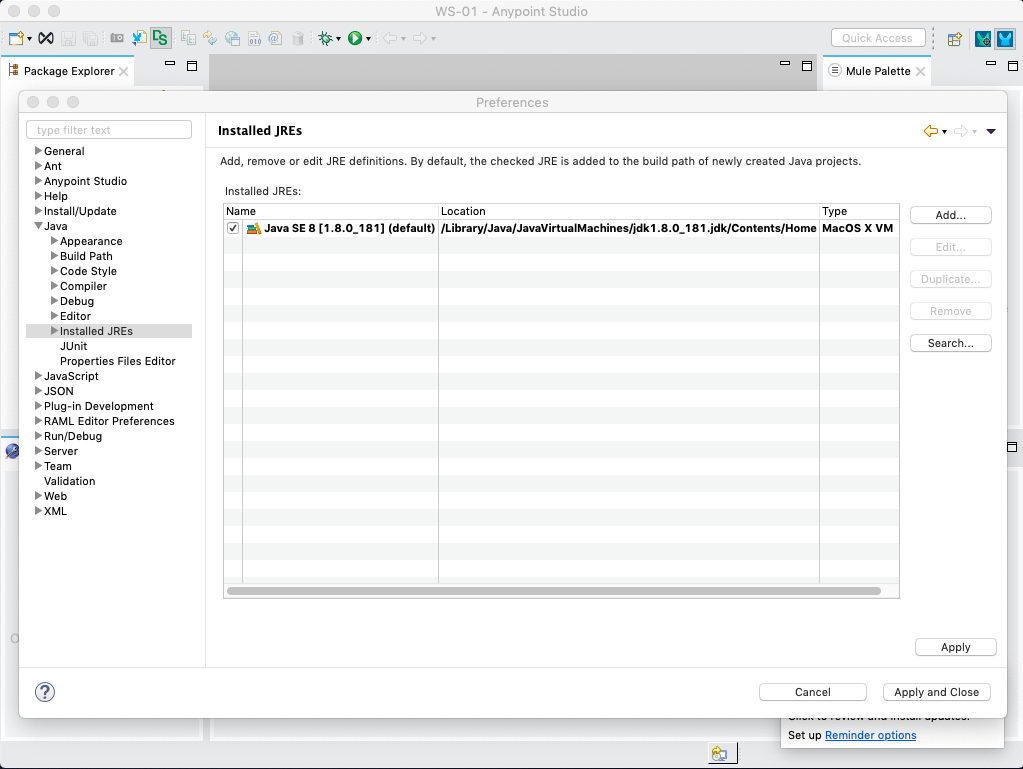
- Open Preferences.
-
Expand Java.
- Windows and Linux : Window > Preferences.
- Mac : Anypoint Studio > Preferences.
- Select Installed JREs.
- If Anypoint Studio is referencing the JRE rather than the JDK, edit the record and remap it to the root of your JDK installation.
- For Windows : Follow this.
- For Linux : Follow this.
- For Mac : Follow this.
- Download the Maven distribution from the Apache Maven download page.
- Unpack the download to a folder on your local drive.
- Create an environment variable called M2_HOME, then set it to the folder into which you unpacked Maven.
-
- Windows : add the following to the PATH variable: %M2_HOME%\bin
- Mac or Linux : add the following to the PATH variable: $M2_HOME/bin
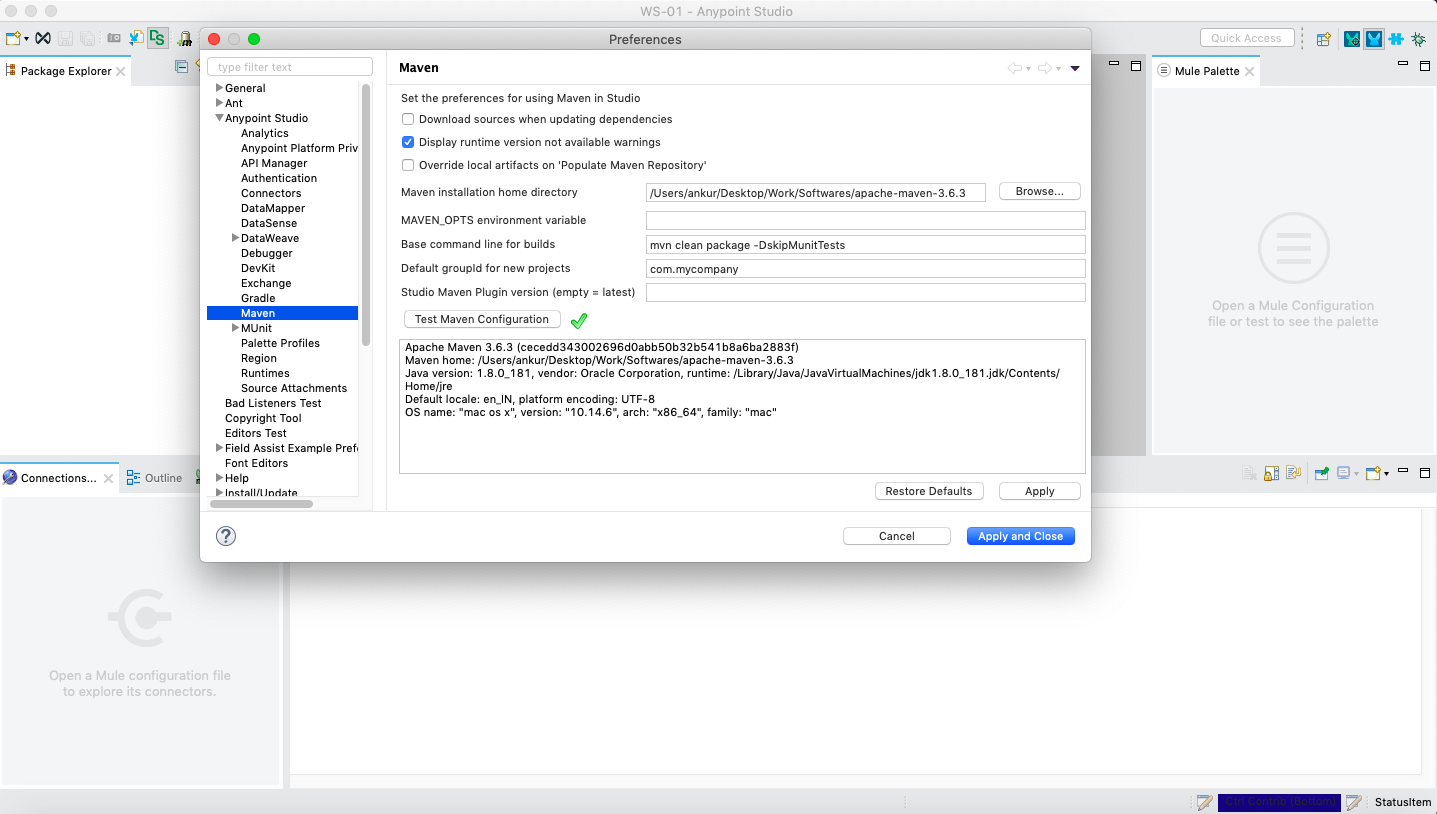
- You can all validate in Anypoint Studio, that the Maven is installed succesfully or nor. Follow the below screenshoot :-
Oracle makes the Java Development Kit (JDK) freely available for all supported platforms, including Windows, Mac OS X and Linux.
Download version 8 as appropriate for your platform and install.
Anypoint Studio must be configured to reference the location of your JDK rather than your JRE. To set JDK as Anypoint Studio’s installed JRE:

Apart from this, please configure the JAVA_HOME in System Path.
Apache Maven provides a build manager that Anypoint Studio uses to build connector projects.
See Maven in Five Minutes for a brief introduction to the concepts and basic commands.

If you configured the JDK and Maven succesfully, please follow with me in next topic to start first Mule Application.
Comments