- Overview
- Requirement of a custom connector :-
- Prerequisites
- Java Development Kit (JDK) : version 7 or 8 to compile and build your Java code.
- Apache Maven : to manage your project’s build.
- Anypoint Studio : as the IDE to build and test your connector.
- Installing the DevKit Plugin in Studio
- To use DevKit in Studio, you must have Apache Maven installed on your local drive :
- To confirm you have Maven installed open the Anypoint Studio preferences (on a Mac click Anypoint > Preferences, on a Windows computer, click Window > Preferences).
- Navigate to Anypoint Studio > Maven Settings and ensure that Maven installation home directory points to the directory in which you installed Maven.
- Click Test Maven Configuration to ensure that Maven is correctly configured.
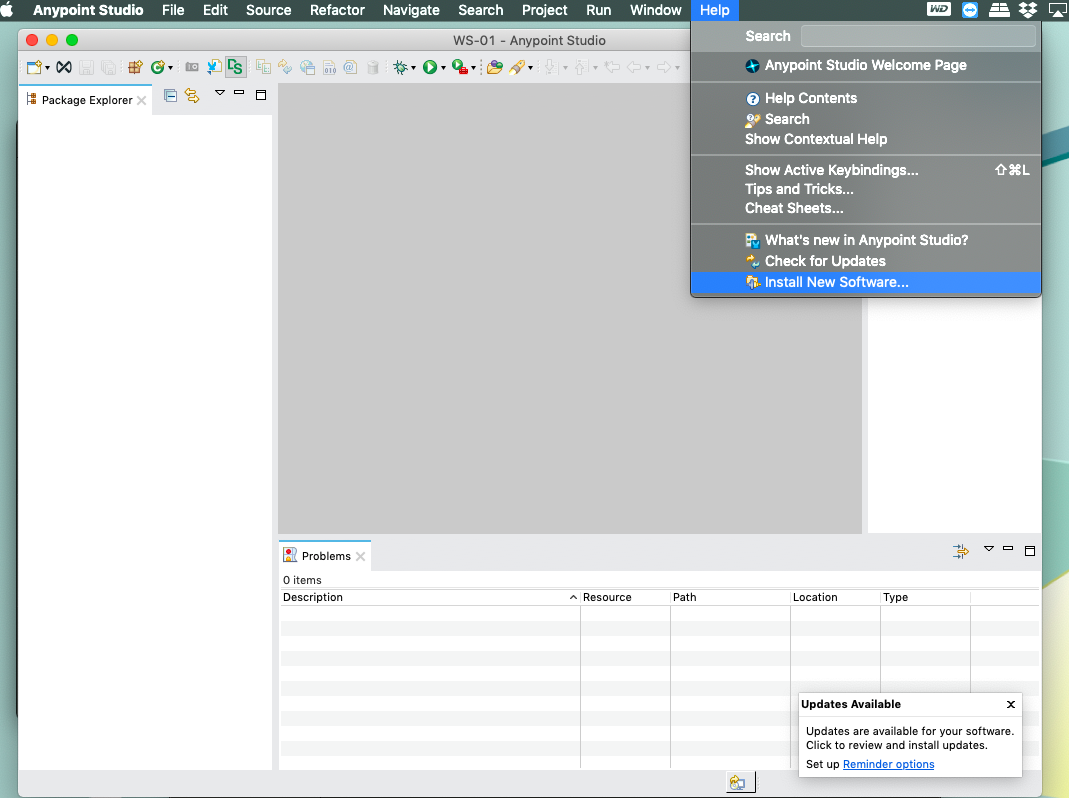
- From the Help menu in Anypoint Studio, click Install New Software :
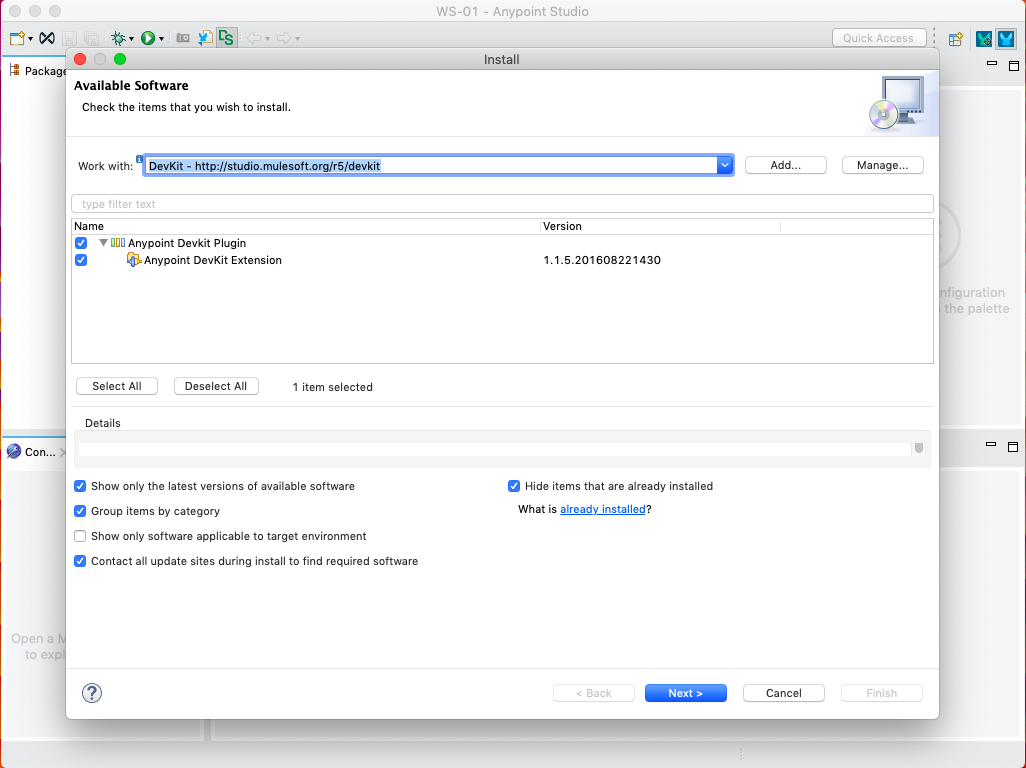
- In the Install menu’s Work with drop-down menu, click the down arrow and click Anypoint DevKit Update Site. Click the checkbox for Anypoint DevKit Plugin, and click Next.
- If the Anypoint DevKit Update Site is not available in the dropdown list, click Add and copy this URL to the repository :- http:/studio.mulesoft.org/r6/devkit
- Proceed through the remaining steps in the wizard to install.
- Restart Studio.
- Steps to Create a Connector
- Click on the Add View icon in the upper right corner of Anypoint Studio, select Devkit and click on OK.
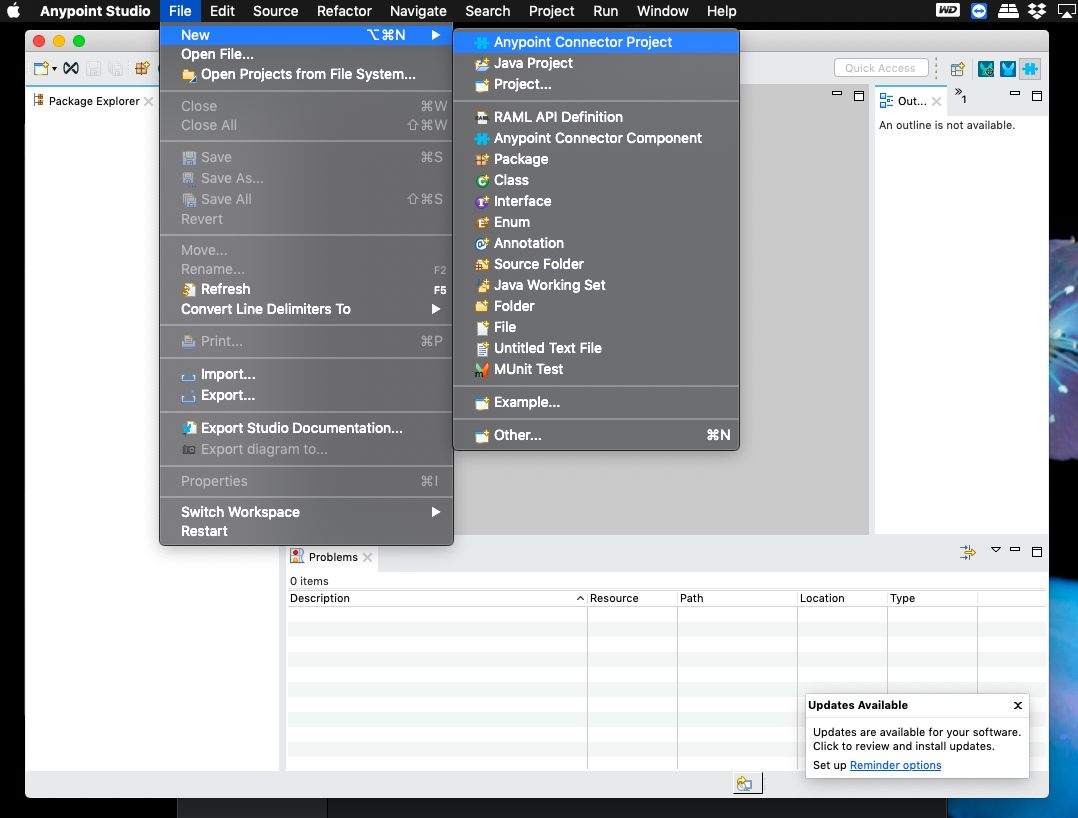
- Click File > New > and then select Anypoint Connector Project to create a new project to build the connector.
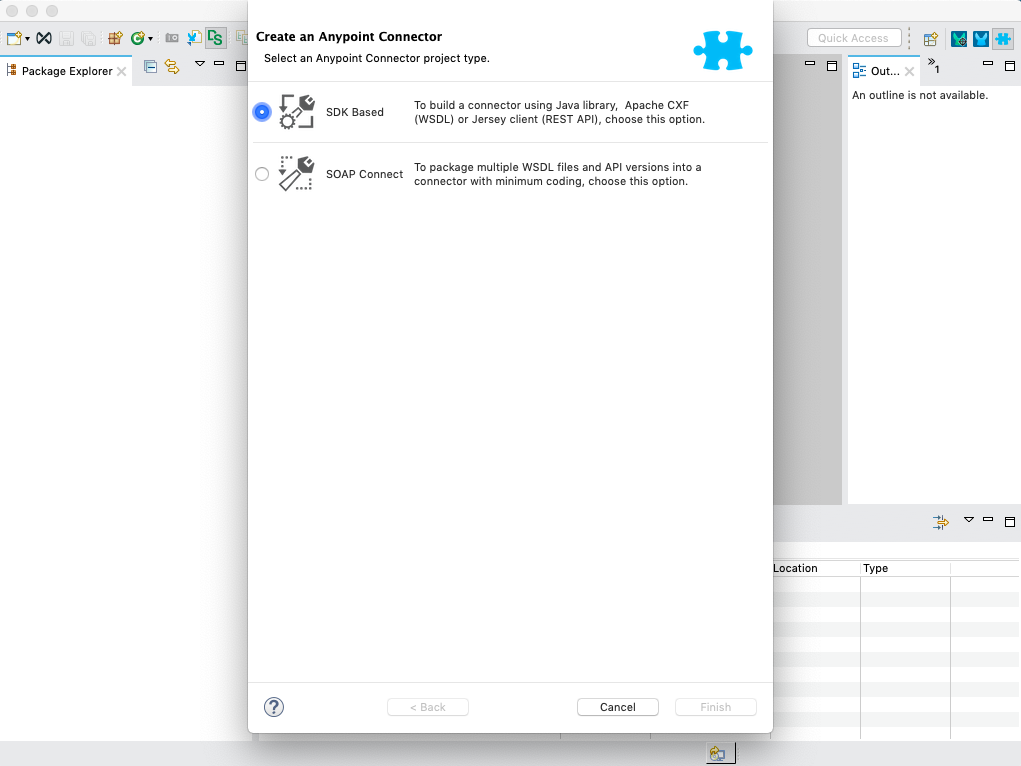
- Select SDK Based, as this connector is built using Java library, and click Next.
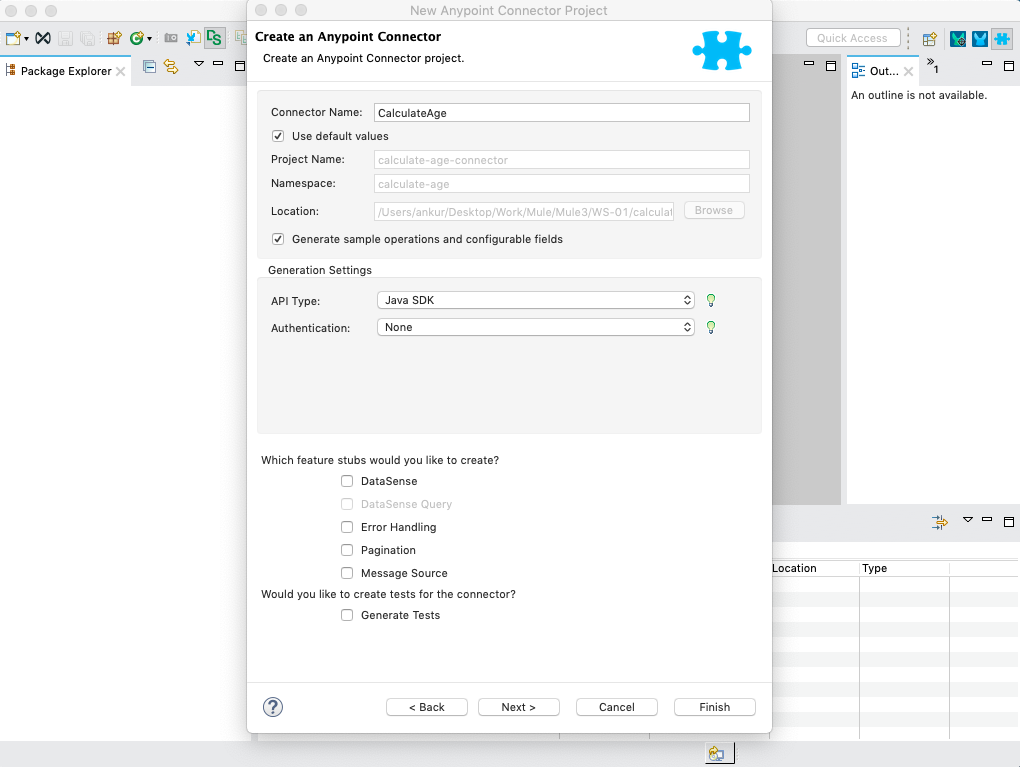
- Give the name(example: calculateAge) for the connector in the Connector name field and click Finish. Upon clicking the Finish button, Anypoint Studio will download all the dependencies that help in building the connector.
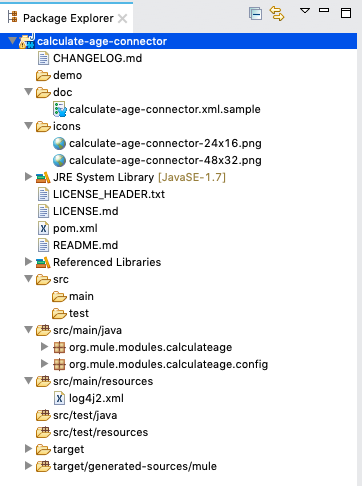
- Now the connector project(example: calculate-age-connector) will be created with all the folders and folder structure to develop the connector. After creating the project, the folder structure of the project will be as shown below.
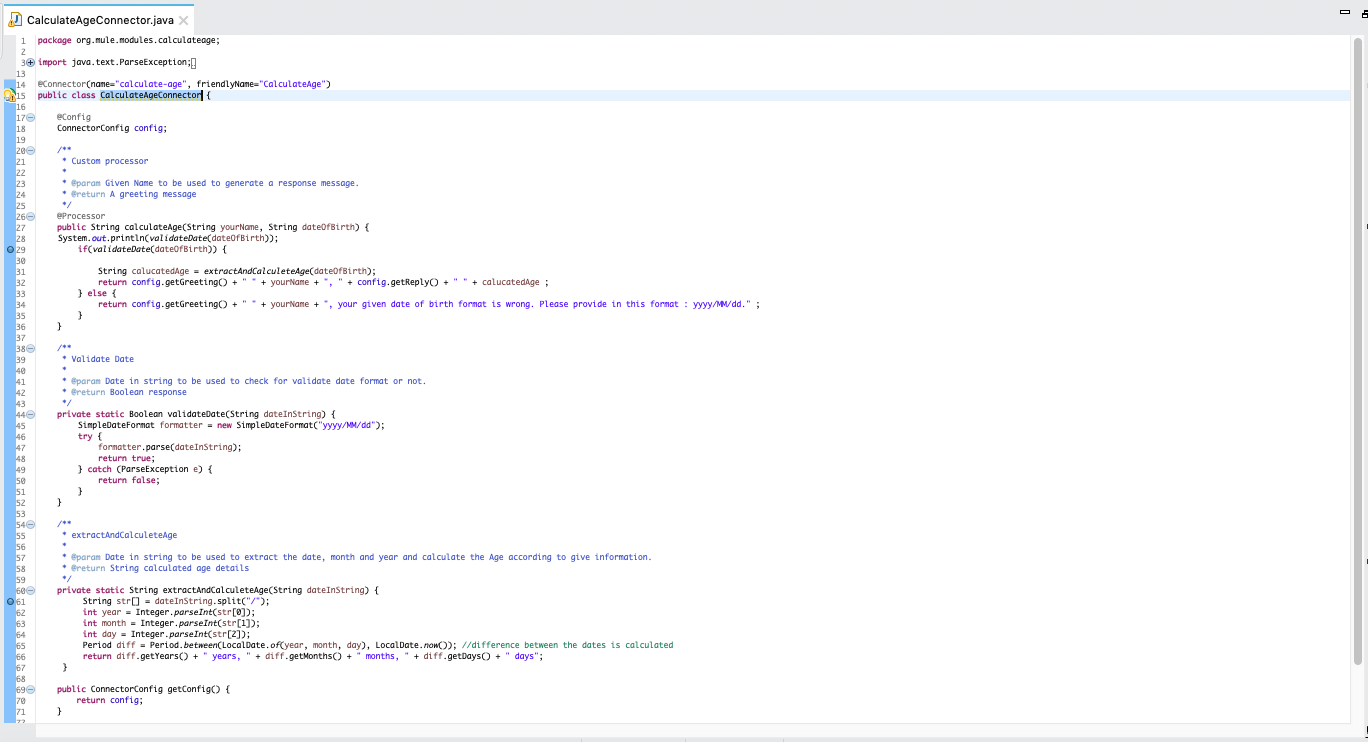
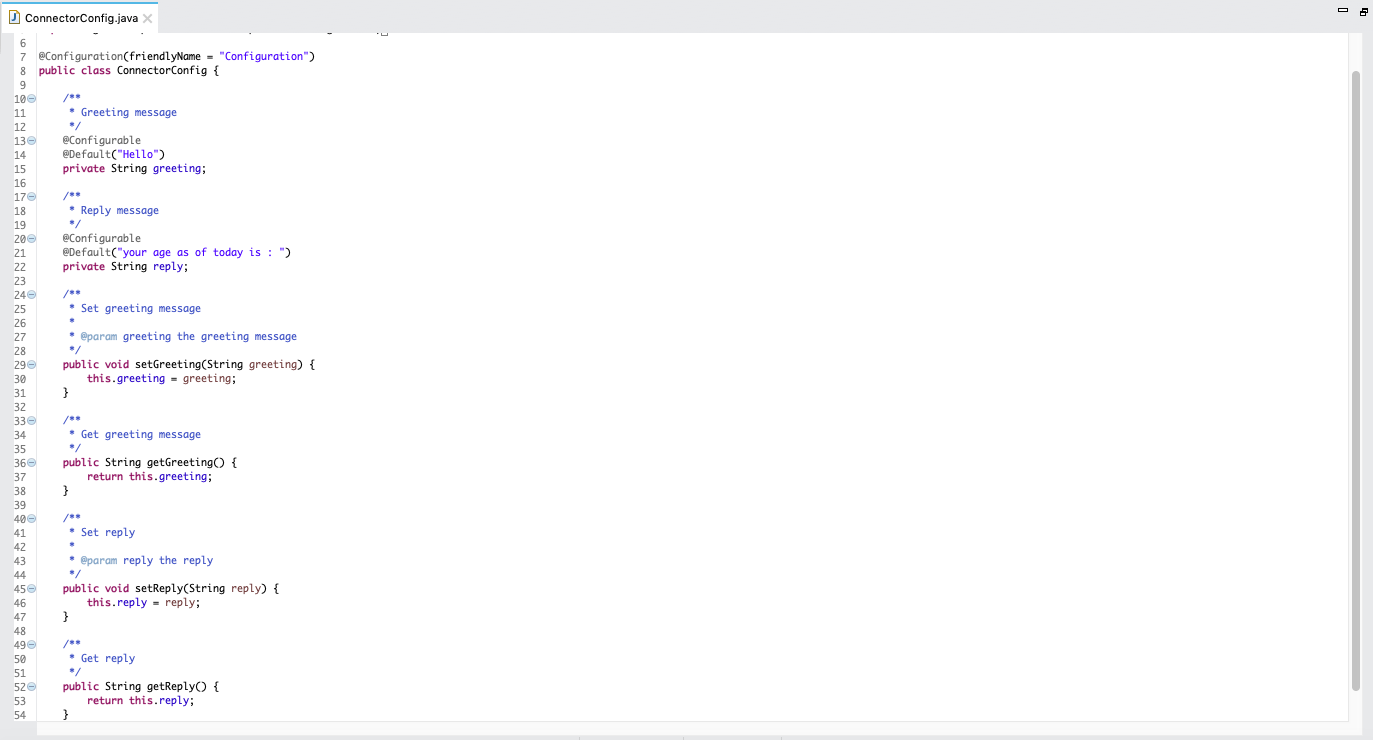
- When the project is created, a sample code will be automatically given in the project. This code can be found in CalculateAgeConnector.java and ConnectorConfig.java classes. The CalculateAgeConnector.java class contains the code that adds the functionality to the connector. The ConnectorConfig.java class contains code that is related to the configuration of the connector, like connection details.
- If the connector requires the fields for connection, then these two classes will be interlinked. These classes can be found in two separate packages. CalculateAgeConnector.java will be present in org.mule.modules.calculateage and ConnectorConfig.java in the org.mule.modules.Calculateage.config package. Both the packages can be found under the src/main/java folder.
- The CalculateAgeConnector.java class contains the code that adds the functionality to the connector. In this class we have written logic to calculate Age of a person based on given data-of-birth.
- In this class, three packages will be automatically imported for the annotations which will be used in the class. The three packages can be seen below:
- org.mule.api.annotations.Config;
- org.mule.api.annotations.Connector;
- org.mule.api.annotations.Processor;
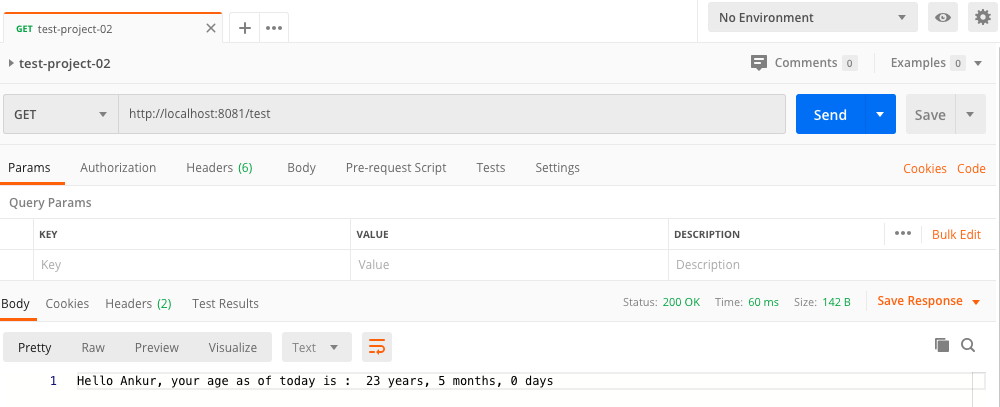
- Here, for valid Date format the connector will return a output as "Hello Ankur, your age as of today is : 23 years, 6 months, 0 days"
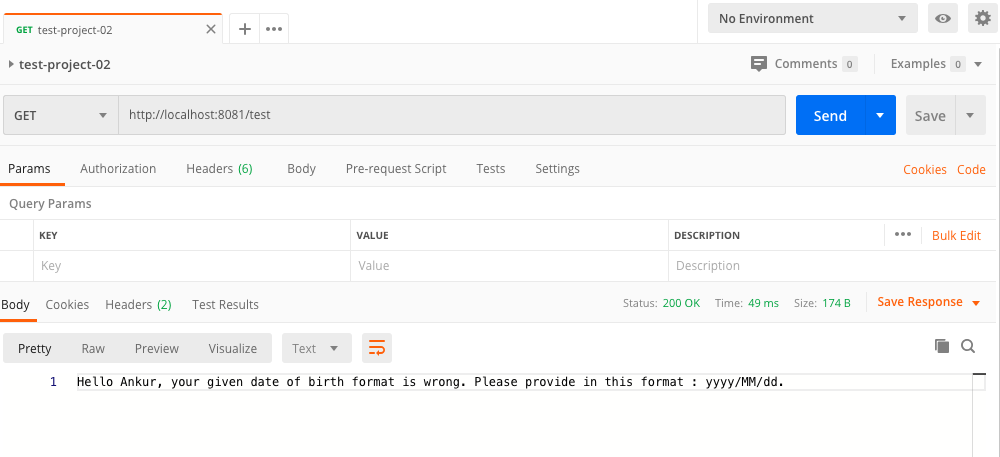
- And also for invalid Date format the connector will return a output as "Hello Ankur, your given date of birth format is wrong. Please provide in this format : yyyy/MM/dd."
- The ConnectorConfig.java class contains code that is related to the configuration, like connection details. You can see the code that is generated in this class when the project is created. If your connector does not require any configuration, you can remove all the code in this class which will not be used in connector configuration.
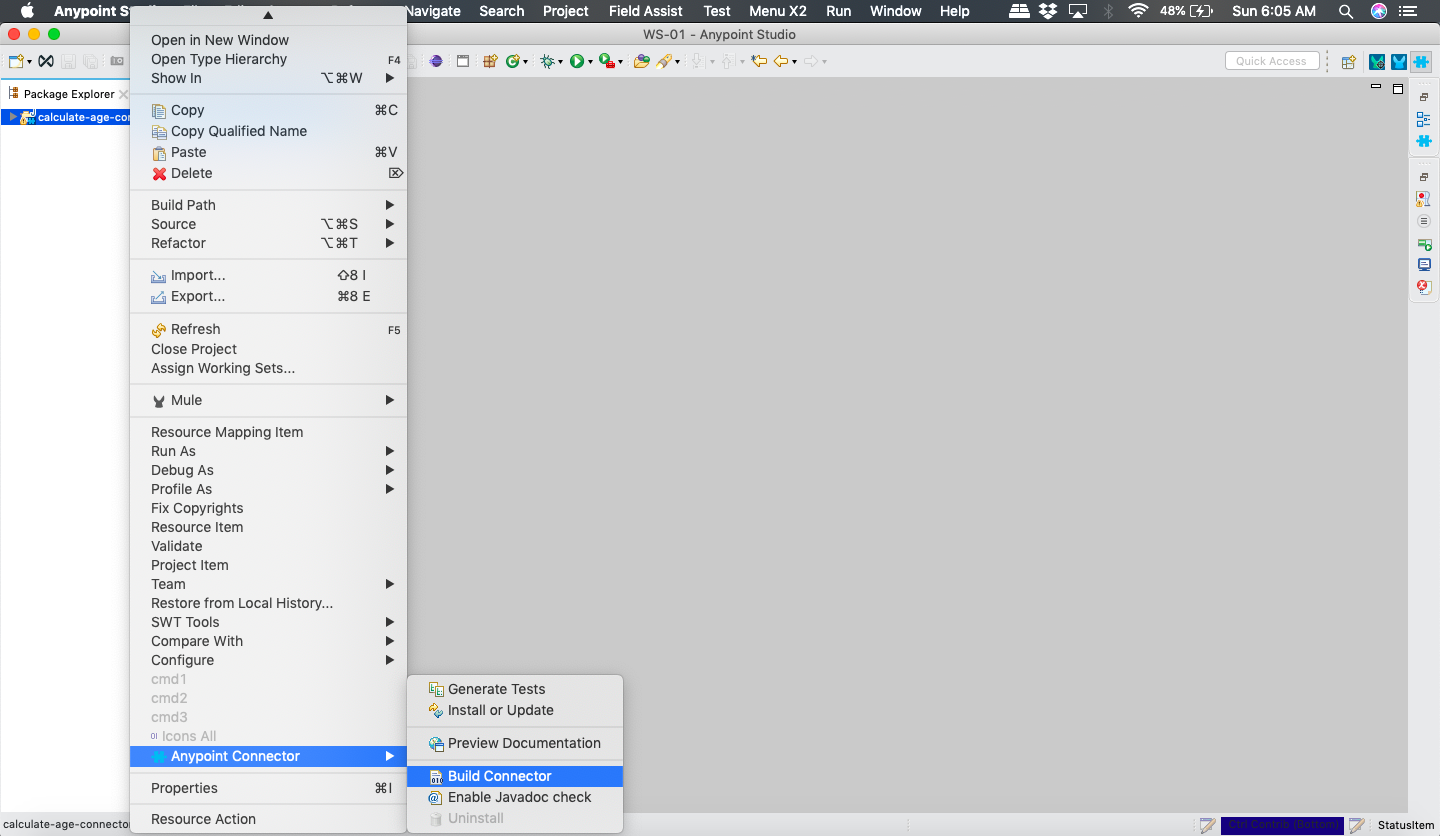
- To build the connector, click on the connector project calculate-age-connector > select Anypoint Connector and select Build Connector.
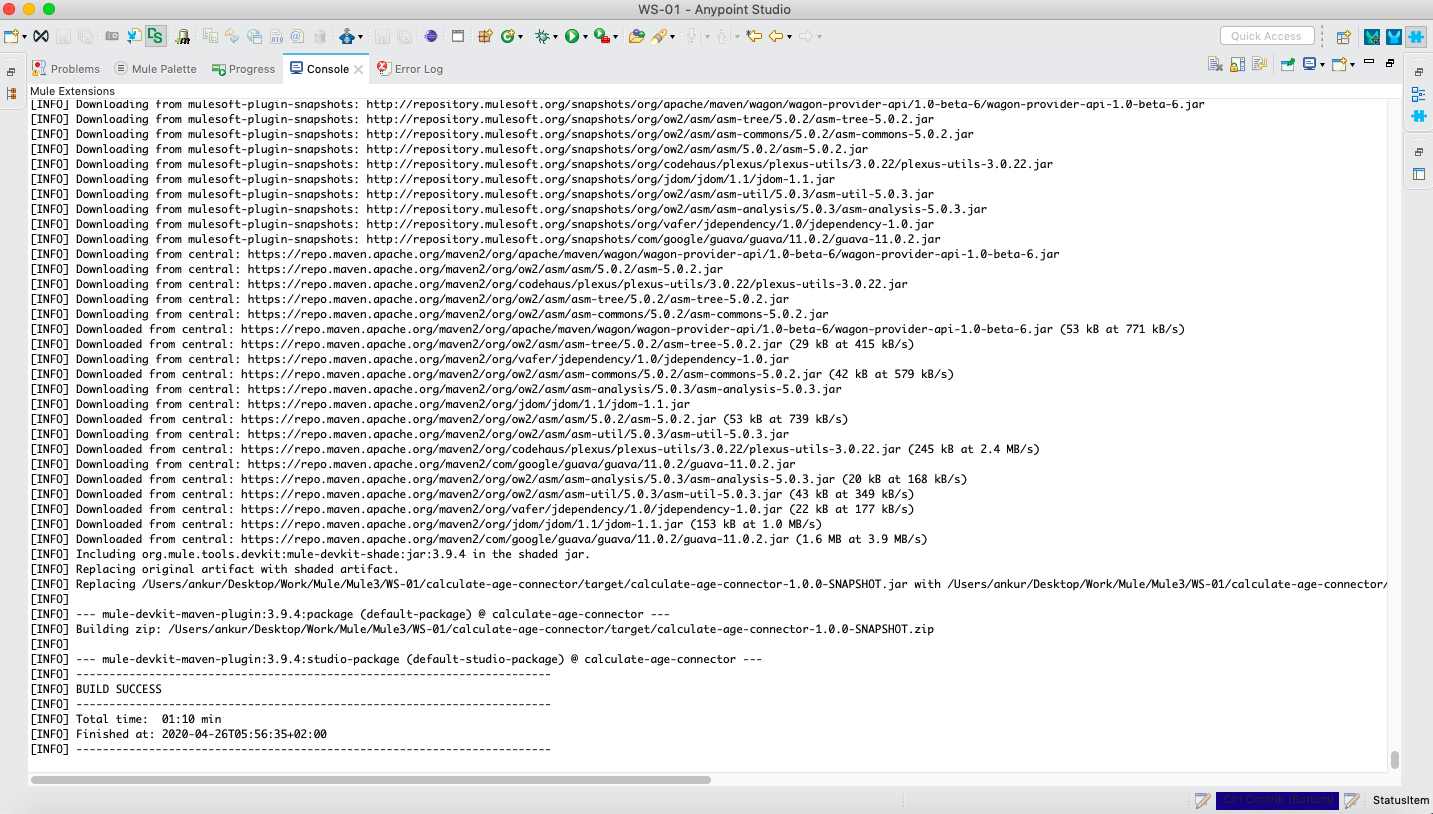
- It will be clear that the connector has been successfully built when you see the BUILD SUCCESS message in the console area.
- Now the connector needs to be installed so that it can be used in Mule flows to build Mule applications. To install the connector, click on connector project calculate-age-connector > Select Anypoint Connector and Select Install or Update.
- It will be clear that the connector has been successfully installed when you see the BUILD SUCCESS message in the console area.
- Now go back to Mule Design mode by selecting Mule Design at the upper right corner of Anypoint Studio to test the connector.
- In Mule Design mode, if you search for the connector with its name(example: CalculateAge), you can find the connector if it is successfully installed.
- Connector Testing
- To test the connector, build a Mule application. To create the Mule application, click on File > New > Mule Project.
- Provide project name as Project02 by choosing lastest version of Mule3 server.
- Now the Mule project will be created. Drag and drop an HTTP palette onto the process canvas. Here, I am using HTTP as the source, but you can have any process as the source to start the Mule flow. Configure HTTP by providing the port number followed by the calculateAge connector.
- Now configure the CalculateAge connector as shown below :-
- Run the Mule application. Click on the process canvas and select Run project.Once the Mule application deployed successfully send a request.
- If the configured date-of-birth is VALID format, then it will return the response like this :-
- If the configured date-of-birth is INVALID format, then it will return the response like this :-
Anypoint Connectors helps to integrate the Mule applications with third-party APIs and standard integration protocols, providing a means to access web services and resources.
Use the connectors within Mule flows to send and receive data over a protocol or using an API.
In this chapter we will learn how to create a custom connector and that can be use through out any Mulesoft project when the requirements get matched.
Our goal is to calculate a user’s age based on his give Date Of Birth in this format :- yyyy/MM/dd
Please follow the previous chapter where I already explained about the JDK installation.
Please follow the previous chapter where I already explained about the Maven installation.
Although you can use any Java IDE with Maven support, it’s strongly recommended that you use Anypoint Studio, as it streamlines and simplifies several of the steps needed to build your connector.
If you have not already installed Anypoint Studio, follow the detailed instructions to install.
For a quick introduction to Anypoint Studio, review Anypoint Studio Essentials.
To install the DevKit Plugin:



Comments